

SpringBootでログインログアウト機能を実装したいと思います。
本記事では、長編となるため、ログイン機能のみを紹介します。
ログアウト機能はこちらの記事からお願い致します。
SpringBootのプロジェクトを生成
こちらのサイトからSpringBootのプロジェクトを作成しましょう。
| Project | Gradle |
|---|---|
| Language | Java |
| SpringBoot | 3.1.1 |
| Packaging | Jar |
| Java | 17 |
- Spring Web
- Thymeleaf
- Spring Security
- PostgresSQL Driver
ログイン、ログアウト機能ということで、ユーザーやパスワードを記憶するデータベースを使います。
今回は、PostgreSQLというデータベースを使用します。
以上を選択して、プロジェクトを生成しましょう。
PostgresSQLをインストールする
データベースを使用するため、PostgreSQLをインストールする必要があります。
本記事では、SpringBootの内容に焦点を当てているため、割愛させてください。
ネットを調べていただければ、たくさん情報があります。
PostgresSQLにテーブルを生成
ユーザー情報を格納するテーブルを生成します。
PostgreSQLにログインして、新しくデータベースを作成しましょう。
postgres=# create database authdb;
CREATE DATABASE
新しく作ったデータベース「authdb」に移動します。
postgres=# \c authdb;
データベース"authdb"にユーザ"postgres"として接続しました。
authdb=#
テーブルを生成します。
ユーザーとパスワードを管理するusersテーブルとそのユーザーと権限を管理するauthoritiesテーブルを生成します。
authdb=# create table users(
authdb(# id serial not null primary key,
authdb(# username varchar(100) not null,
authdb(# password varchar(100) not null,
authdb(# enabled boolean not null default false
authdb(# );
CREATE TABLE
authdb=# create table authorities(
authdb(# id serial not null primary key,
authdb(# username varchar(100) not null,
authdb(# authority varchar(100) not null
authdb(# );
CREATE TABLE
authdb=#
application.propertiesを編集
生成した当初は、何も書かれていないファイルだと思います。
こちらのファイルに以下のコードを入力しましょう。
spring.datasource.url=jdbc:postgresql://localhost:5432/authdb
spring.datasource.username=postgres
spring.datasource.password=postgres
spring.datasource.driverClassName=org.postgresql.Driver
1行目にpostgreSQLのポート番号とデータベース名を記述
2行目と3行目は、postgreSQLに入る際のユーザ名とパスワードを入力しています。
4行目は、postgreSQLのドライバークラス名になります。
SpringSecurityのメソッドセキュリティ
本記事では、SpringSecurityのメソッドセキュリティを使用します。
メソッドセキュリティとは、メソッドごとに認証(アクセスできるロール)を指定できる特徴があります。
管理者のみ実行したい場合やすべてのユーザが実行したい場合のメソッドごとに指定できるのです。
セキュリティ構成クラスの作成
では、SpringBootの○○Application.javaと同じ階層にSecurityConfig.javaを作成しましょう。
そして、以下のようなコードを記述しましょう。
エディタがVSCodeであれば、import文を書かなくてもTabキーで補完されます。
また、補完されなかったときは、赤い波線からQuickFixでimport~を選択しましょう。
package com.example.demo;

import javax.sql.DataSource;

import org.springframework.beans.factory.annotation.Autowired;
import org.springframework.context.annotation.Bean;
import org.springframework.context.annotation.Configuration;
import org.springframework.security.config.annotation.method.configuration.EnableMethodSecurity;
import org.springframework.security.config.annotation.web.builders.HttpSecurity;
import org.springframework.security.web.SecurityFilterChain;

@Configuration
@EnableMethodSecurity
public class SecurityConfig {
    @Autowired
    private DataSource dataSource;

    @Bean
    public SecurityFilterChain filterChain(HttpSecurity http) throws Exception{
        http.authorizeHttpRequests(authorize->{
            authorize.anyRequest().permitAll();
        });
        http.formLogin(form->{
            form.defaultSuccessUrl("/home");
        });
        return http.build();
    }
}
12,13行目に、@Configurationと@EnableMethodSecurityがあります。
これで、メソッドセキュリティを使いますよと宣言しています。因みに@は、アノテーションを言います。
21行目ので、すべてのリクエストのアクセスを許可しています。
23~25行目は、ログイン成功時のURL先を指定しています。ログイン成功すると”/home”に移動します。
ログイン後のページの生成
ログイン成功時のページを作成しましょう。
ログインできたか確認するだけなので、簡素なページにします。
resources/templatesにhome.htmlを作ります。
<!DOCTYPE html>
<html>
    <meta charset="UTF-8">
    <body>
        <h2>ようこそ</h2>
    </body>
</html>
コントローラの生成
SecurityControllerを生成します。
package com.example.demo;

import org.springframework.security.access.prepost.PreAuthorize;
import org.springframework.stereotype.Controller;
import org.springframework.web.bind.annotation.RequestMapping;
import org.springframework.web.servlet.ModelAndView;

@Controller
public class SecurityController {
    @RequestMapping("/home")
    @PreAuthorize("hasRole('USER')")
    public ModelAndView index(ModelAndView mav) {
        mav.setViewName("home");
        return mav;
    }
}
10行目で/loginにアクセスするとhomeメソッドが実行されます。
homeメソッドは、home.htmlを返します。
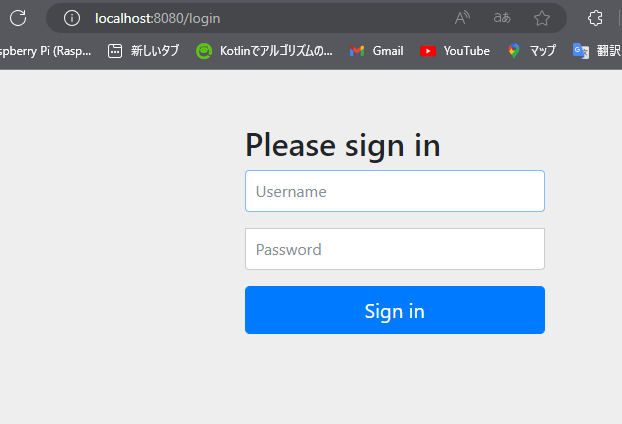
しかし、ログインされていない場合、自動的に/loginにリダイレクトされ、ログインフォームが表示されます。
アプリケーションを実行し、localhost:8080/homeにアクセスしましょう。
ログインフォームが出てきて、localhost:8080/loginに変わったでしょうか。ここで、ログインをし、成功するとhomeメソッドが実行され、home.htmlが返されます。

しかし、現状では、ユーザーが登録されていないためログインできません。
したがって、ユーザーを登録しましょう。
ユーザーの登録
SecurityConfig.javaに以下のコードを追記します。
  @Bean
    public UserDetailsManager userDetailsManager() {
        JdbcUserDetailsManager users = new JdbcUserDetailsManager(this.dataSource);
        users.createUser(makeUser("user","password","USER"));
        return users;
    }
    private UserDetails makeUser(String user,String pw,String role) {
        return User.withUsername(user)
        .password(
            PasswordEncoderFactories
            .createDelegatingPasswordEncoder()
            .encode(pw))
            .roles(role)
            .build();
    }
文頭に以下のimport文を宣言する必要があります。
import org.springframework.security.core.userdetails.User;
import org.springframework.security.core.userdetails.UserDetails;
import org.springframework.security.crypto.factory.PasswordEncoderFactories;
import org.springframework.security.provisioning.JdbcUserDetailsManager;
import org.springframework.security.provisioning.UserDetailsManager;
これで、アプリケーションを実行すると
ユーザー名:user、パスワード:password、権限:USERというユーザー情報が登録されます。
アプリケーションを実行してlocalhost:8080/homeにアクセスしましょう。
ログインフォームにuserとpasswordを入力し、ログインしてみます。
ようこその文字がでたらログイン成功です。

また、ユーザーの登録の際に追記したコードは、消しておくかコメントアウトしておきましょう。
なぜなら、アプリケーションを実行毎にユーザーが追加されてしまうからです。
そして、以下のコードを追記します。
    @Bean
    public UserDetailsManager userDetailsManager() {
        return new JdbcUserDetailsManager(this.dataSource);
    }
こうすることでアプリケーションを再度実行してもログイン機能が正常に動きます。
以上までがSpringSecurityを用いたログイン機能の実装でした。
続きのログアウト機能はこちらの記事からお願い致します。