APIとは、サービスを展開している企業などが、ソフトウェアの一部をWEB上に公開することによって、そのサービスの機能を使うことができるものです。
本記事では、たくさんあるAPIの中でもOpenWeatherさんのWatherAPIを用いて、WordPressに天気を表示させます。
API keyの取得
APIを使う際、登録してAPI keyを取得する必要があります。
ですので、まずはOpenWeatherのアカウントを作成しましょう。
こちらのページからアカウントを作成しましょう。
ページでユーザ名、メールアドレス、パスワードを入力します。
16歳以上(I am 16 years old and over)とプライベートポリシーに同意(I agree with Privacy Policy, Terms and conditions of sale and Websites terms and conditions of use)にチェックを入れ、
Create Accountのボタンをクリックしましょう。
するとAPI keyが作成されます。このAPI keyは、自分専用のキーになります。
現在の天気を取得する
特定の場所の現在の天気を取得する場合、郵便番号、緯度経度を指定したり、市の名前で設定できます。
本記事では、市の名前で取得します。ちなみに緯度、経度で指定すればより正確に場所を指定できます。
APIからデータを取得
現在の天気を取得する場合、以下のURLをWebブラウザで表示しましょう。
http://api.openweathermap.org/data/2.5/weather?q={取得したい市の名前},jp&APPID={自分のAPIキー}具体例として、東京の現在の天気を取得する場合は、取得したい市の名前にTokyoとすればよいです。
Webブラウザで開くとJSON形式でデータが返ってきます。

見づらいので整理すると以下のようにデータが格納されています。
{
  "coord": {
    "lon": 139.6917,
    "lat": 35.6895,
  },
  "weather": [
    {
      "id": 803,
      "main": "Clear",
      "description": "clear sky",
      "icon": "01d"
    }
  ],
  "base": "stations",
  "main": {
    "temp": 22.51,
    "feels_like": 22.75,
    "temp_min": 19.25,
    "temp_max": 22.75,
    "pressure": 1023,
    "humidity": 100
  },
  "visibility": 16093,
  "wind": {
    "speed": 1.5,
    "deg": 350
  },
  "clouds": {
    "all": 1
  },
  "dt": 1560350645,
  "sys": {
    "type": 2,
    "id": 2038398,
    "message": 0.0139,
    "country": "JP",
    "sunrise": 1560343627,
    "sunset": 1560396563
  },
  "timezone": -25200,
  "id": 1850144,
  "name": "Tokyo",
  "cod": 200
  }
weather[0]->mainが天気、main->tempが気温、main->pressureが気圧、main->humidityが湿度です。
WordPressで表示
WordPressで表示させるためには、PHPを使う必要があります。
本記事では、PHP Everywhereを使用しました。
PHP Everywhereの記事は以下を参照してください。
PHP Everywhereで以下のコードを記述しましょう。
<?php

switch( $instance ) {
  case 'Hokkaido': {
print_r("<h1>札幌</h1>");
$key="Sapporo,jp";
    break;
  }
  case 'Sendai': {
print_r("<h1>仙台</h1>");
$key="Sendai,jp";
    break;
  }
  case 'Tokyo': {
print_r("<h1>東京</h1>");
$key="Tokyo,jp";
    break;
  }
  case 'Nagoya': {
print_r("<h1>名古屋</h1>");
$key="Nagoya,jp";
    break;
  }
  case 'Osaka': {
print_r("<h1>大阪</h1>");
$key="Osaka,jp";
    break;
  }
  case 'Hiroshima': {
print_r("<h1>広島</h1>");
$key="Hiroshima,jp";
    break;
  }
  case 'Hukuoka': {
print_r("<h1>福岡</h1>");
$key="kitakyushu,jp";
    break;
  }
  case 'Naha': {
print_r("<h1>那覇</h1>");
$key="Naha,jp";
    break;
  }
}

$url="https://api.openweathermap.org/data/2.5/weather?q=".$key."&units=metric&APPID="自分のAPIキー";
$json_decode = json_decode( file_get_contents($url));
$weather=$json_decode->weather[0]->main;
$temp=$json_decode->main->temp;
$pres=$json_decode->main->pressure;
$hum=$json_decode->main->humidity;
if( $weather=="Clouds"){
    print_r("<img src='https://enjoy-pglife.com/wp-content/uploads/2021/06/cloud.jpg' width=100px height=100px >");
}
elseif( $weather=="Clear"){
    print_r("<img src='https://enjoy-pglife.com/wp-content/uploads/2021/06/clear.jpg' width=100px height=100px >");
}elseif( $weather=="Rain"){
    print_r("<img src='https://enjoy-pglife.com/wp-content/uploads/2021/06/rain.jpg' width=100px height=100px >");
}elseif($weather=="Snow"){
    print_r("<img src='https://enjoy-pglife.com/wp-content/uploads/2021/06/snow.jpg width=100px height=100px >'");
}elseif($weather=="Mist"){
    print_r("<img src='https://enjoy-pglife.com/wp-content/uploads/2021/06/mist.jpg' width=100px height=100px >'");
}

print_r("<table border=1><thead><tr><th>気温[℃]</th><th>気圧[hPa]</th><th>湿度[%]</th></tr></thead><tbody><tr><td>".$temp."</td><td>".$pres."</td><td>".$hum."</td></tr></tbody></table>");
?>
3から44行目で市の名前をswitch文で条件分岐しています。
46行目でAPIからデータを取得した際、用いたURLを定義しています。
47行目でJSON エンコードされた文字列を受け取り、それを変数に変換します。要は、データを取得します。
48行目の変数weatherで天気、49行目の変数tempで気温、50行目の変数presで気圧、51行目の変数humで湿度を取得しています。
52行目から63行目は、天気のアイコンを表示させています。imgタグのsourceは、各々変えてください。
WordPressには、以下のようにショートコード[php_everywhere]にinstanceパラメータを設定して実行します。
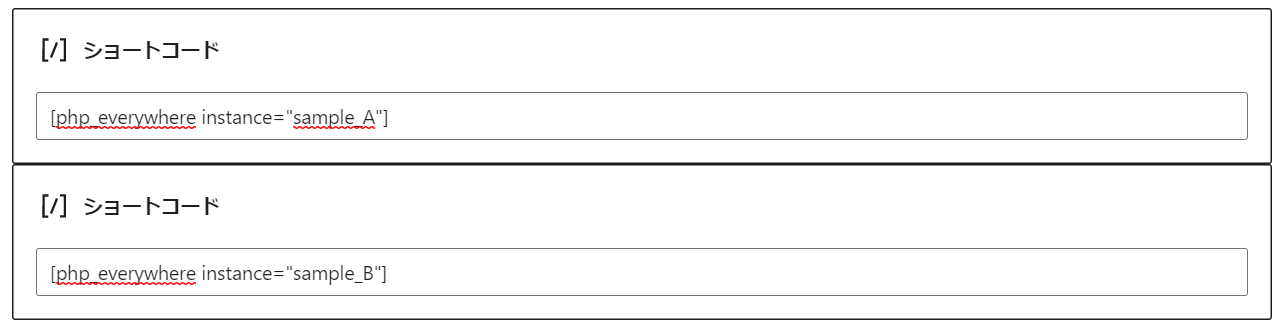
上記のinstanceのsample_A,sample_BをTokyo,Osakaなどに変えましょう。
WordPressのプレビューで確認してみましょう。
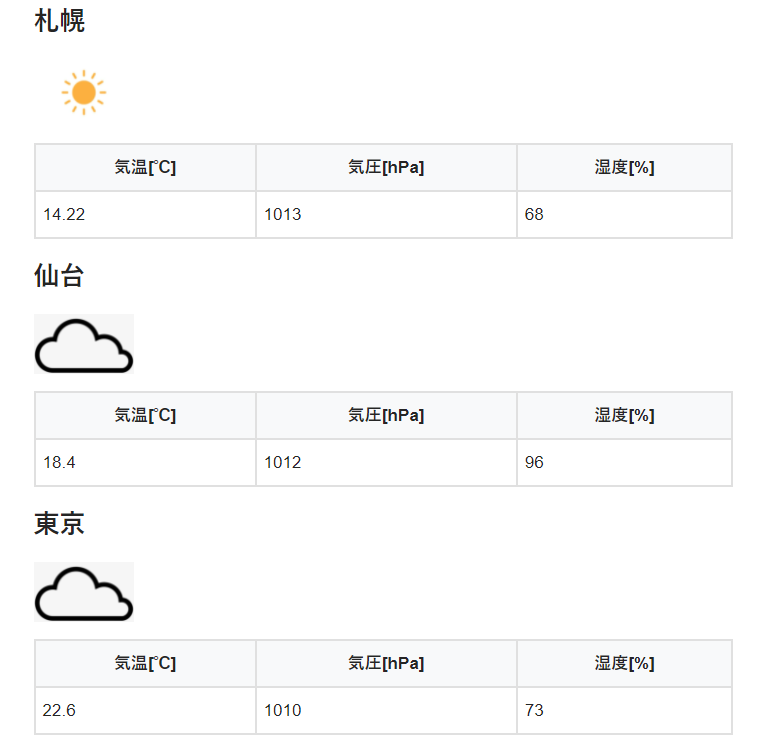
このように表示されたら成功です。アイコンの画像は各々取得してください。
まとめ
現在の天気をWordPressで表示させてみました。
openweatherのドキュメントなどをみていじれば、天気予報も表示できます。
やってみましょう!